This is howto monitor an icecast stream that the stream has not gone quiet and to do in during a specific time. First we need a tool to monitor the audio level. This can actually be done with ffmpeg. Below is a command you can do.
ffmpeg -t 10 -i http://example.com/live.mp3 -af "volumedetect" -f null /dev/null 2>&1 | grep Parsed_volumedetect
We do several things here.
- -t 10 lets us just play the stream we have choosen for 10 seconds before closing ffmpeg
- -i http://example.com/live.mp3 is our icecast stream we want to monitor
- -af “volumedetect” is the audio filter we want to apply on the stream.
- -f null /dev/null is to tell ffmpeg to throw the result away.
- 2>&1 is very important, nomaly the output from ffmpeg you see on your screen is from stderr, by doing this in the end, we force the output out on the normal stdout giving us the possibilty to pipe the output to our grep command.
- Lastly grep Parsed_volumedetect is to only show us the output from the volumedetect filter.
Below we can see the date you can get from volumedetect. The value we want to use is mean_volume which will give us an aproximation on the current audio level in the stream. Max value is zero and anything below -40 db will be considered quite a low volume.
 Now is the part where we convert the code above to a icinga/nagios test. I have uploaded a working example using the above code on https://github.com/Dalesjo/dalesjo-nagios/blob/master/media/check_audio_level Below you can se it in action, giving the correct exit code for icinga/nagios of course.

Next part is to set it up in icinga. The most problematic part here was to get the time period working, or rather understand that it is working. Because the icecast stream i am going to monitor is only streaming audio during the day, I do not want the test to run on the night giving false alarms because nothing is playing.
To setup you do your normal steps in the Icinga Directory.
- Create your command
- Create your service template
- Create your service
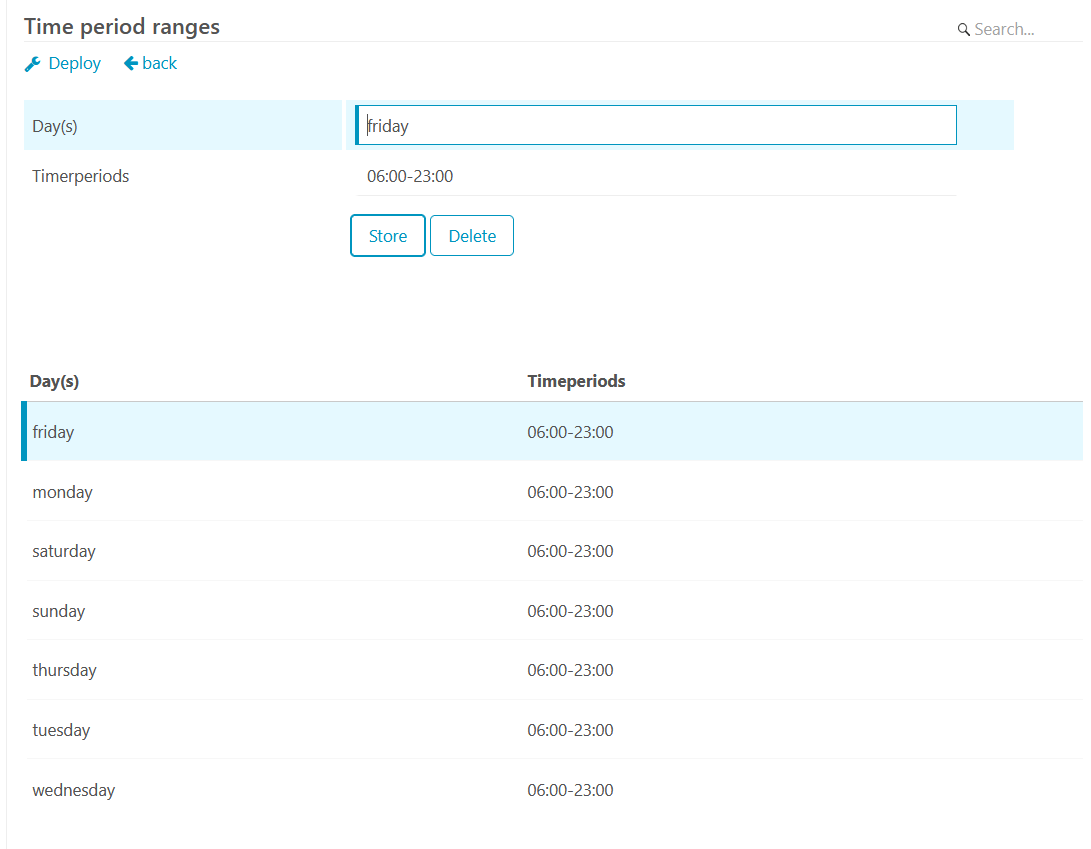
Now to setup your service to only run during certain times. You go to your timeperiods in Icinga Directory and you create a new Timeperiod. You need to give it a name and setup some ranges. The ranges is during which time the test will actually run. It is using the local time of your icinga agent.
 After you have created your first timeperiod. you can go back into your service. and now where is a new property visible under check execution called Check period. In this select box you can now select the time period you just created. After this you can do a new deploy and the service test will only execute during the set times.
Now to the confusing part. If you go to your dashboard and look at your service, it will say that next check is in 5 minutes (or whatever you set it to) evan if you are outside of your timeperiod. The 5 minutes will count down, but you will not get a new result. instead it will start counting down the next 5 minutes.
It will continue to do so until it is time to run the test according to the timeperiod.
Apparantly you can not see in the dashboard that a service currently is not scheduled to run, but it does work in the background as it is suppose to do.